Report profiles
Creating and configuring Report Profiles, the appearance and labels tabs, text blocks, and the Word template style mapping screen.
A Report Profile is where you configure how a report looks and what it contains by default. This page walks through the admin side of that screen. If you’re looking for the tags themselves, see Report template tags for the Document tab and the DOCX template guide for the Word tab. See the Sample report for a worked example built from these pieces.
Managing report profiles needs its own permission, separate from generating or viewing reports themselves.
The profile list
Section titled “The profile list”Opening Report profiles in the sidebar (under Reporting) shows every profile on the instance.
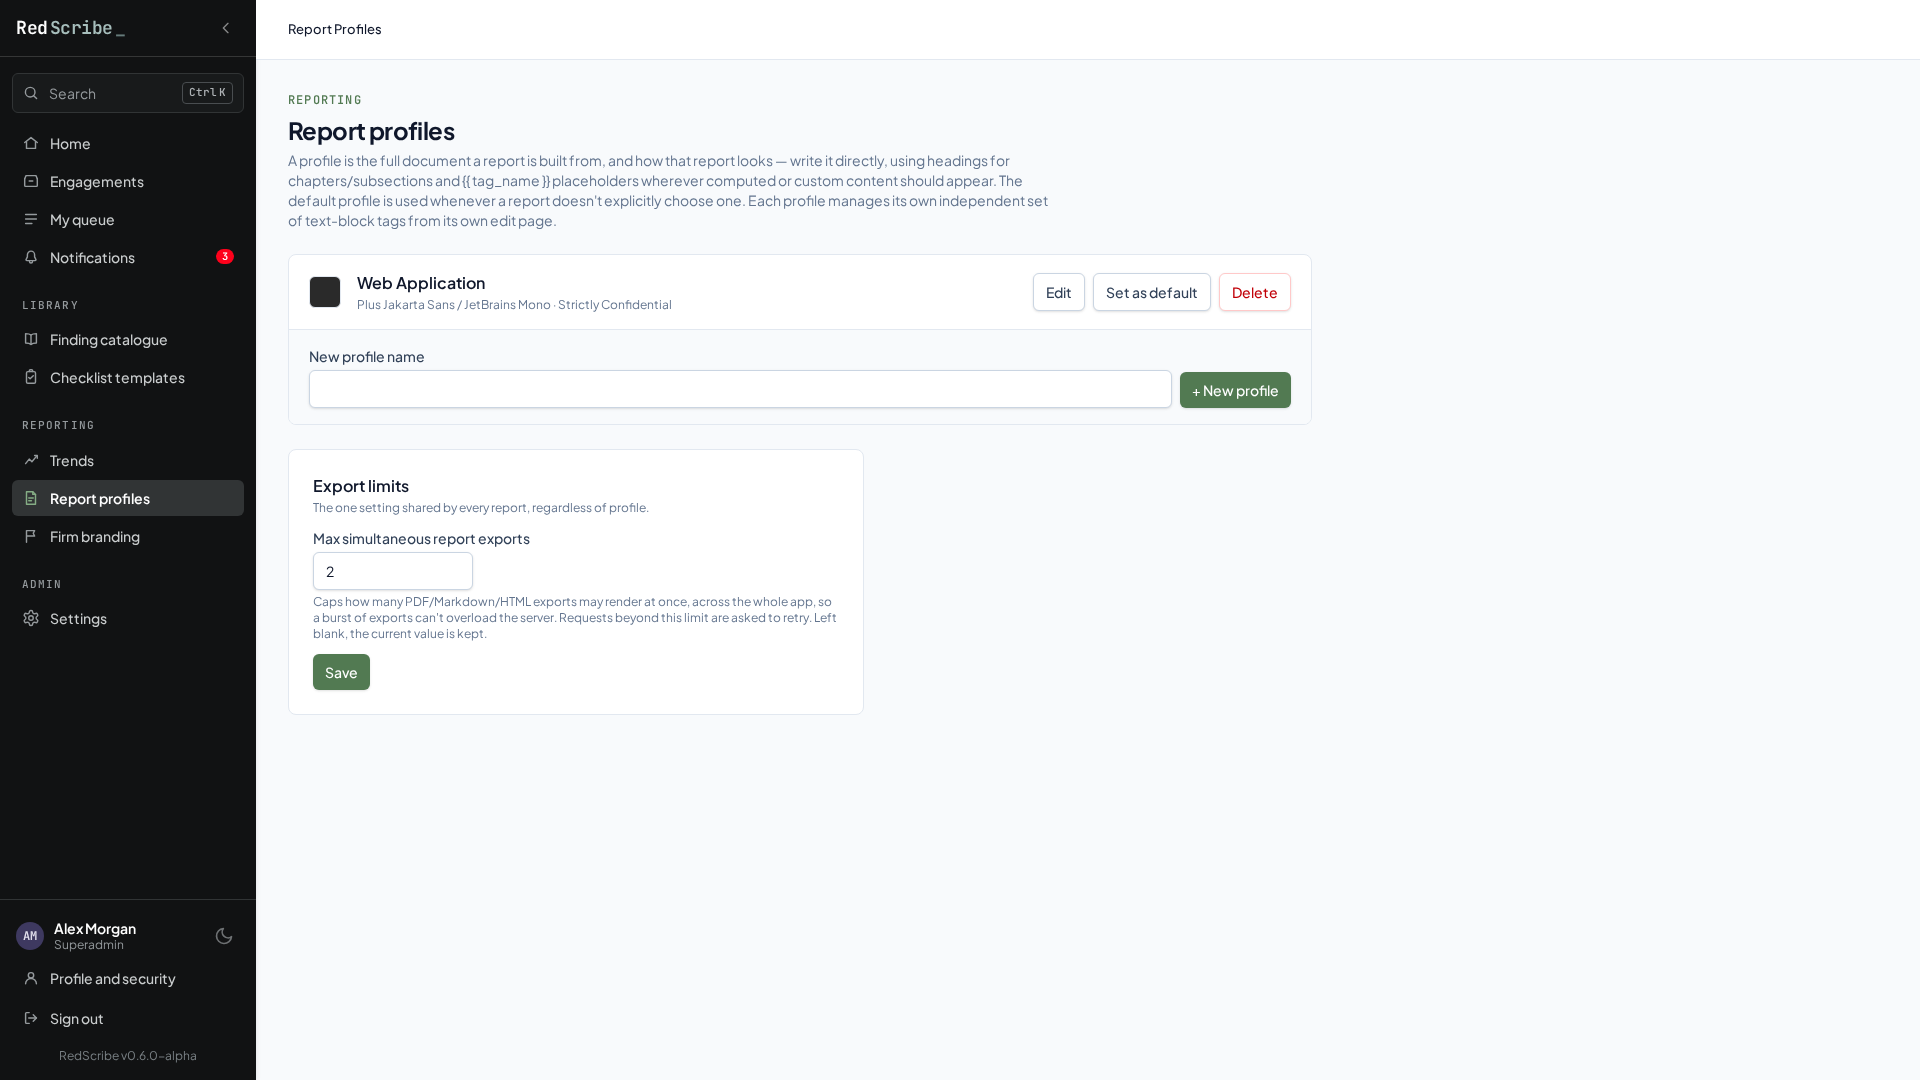
- Create a new profile by giving it a name. It starts empty; build it out from its Document template.
- Set as default makes this the profile pre-selected whenever someone configures a new report.
- Delete removes a profile, but only if it isn’t the current default and isn’t the only remaining profile. Set a different profile as default first if you need to delete the one that currently holds that spot.
- Export limits, also on this page, caps how many report exports can run at once across the whole instance. See Export concurrency for what this actually protects against.
Editing a profile
Section titled “Editing a profile”A profile’s edit page is organized into a handful of sections.
Document template
Section titled “Document template”The free form, tag driven template that drives Markdown, PDF, and HTML export. Every available tag, both the built in structural ones and any text blocks you’ve defined on this profile, is listed live on this same page as you write it. See Report template tags for the full reference.
Appearance
Section titled “Appearance”Fonts, colors, and small pieces of text that change how a report looks without touching its content.
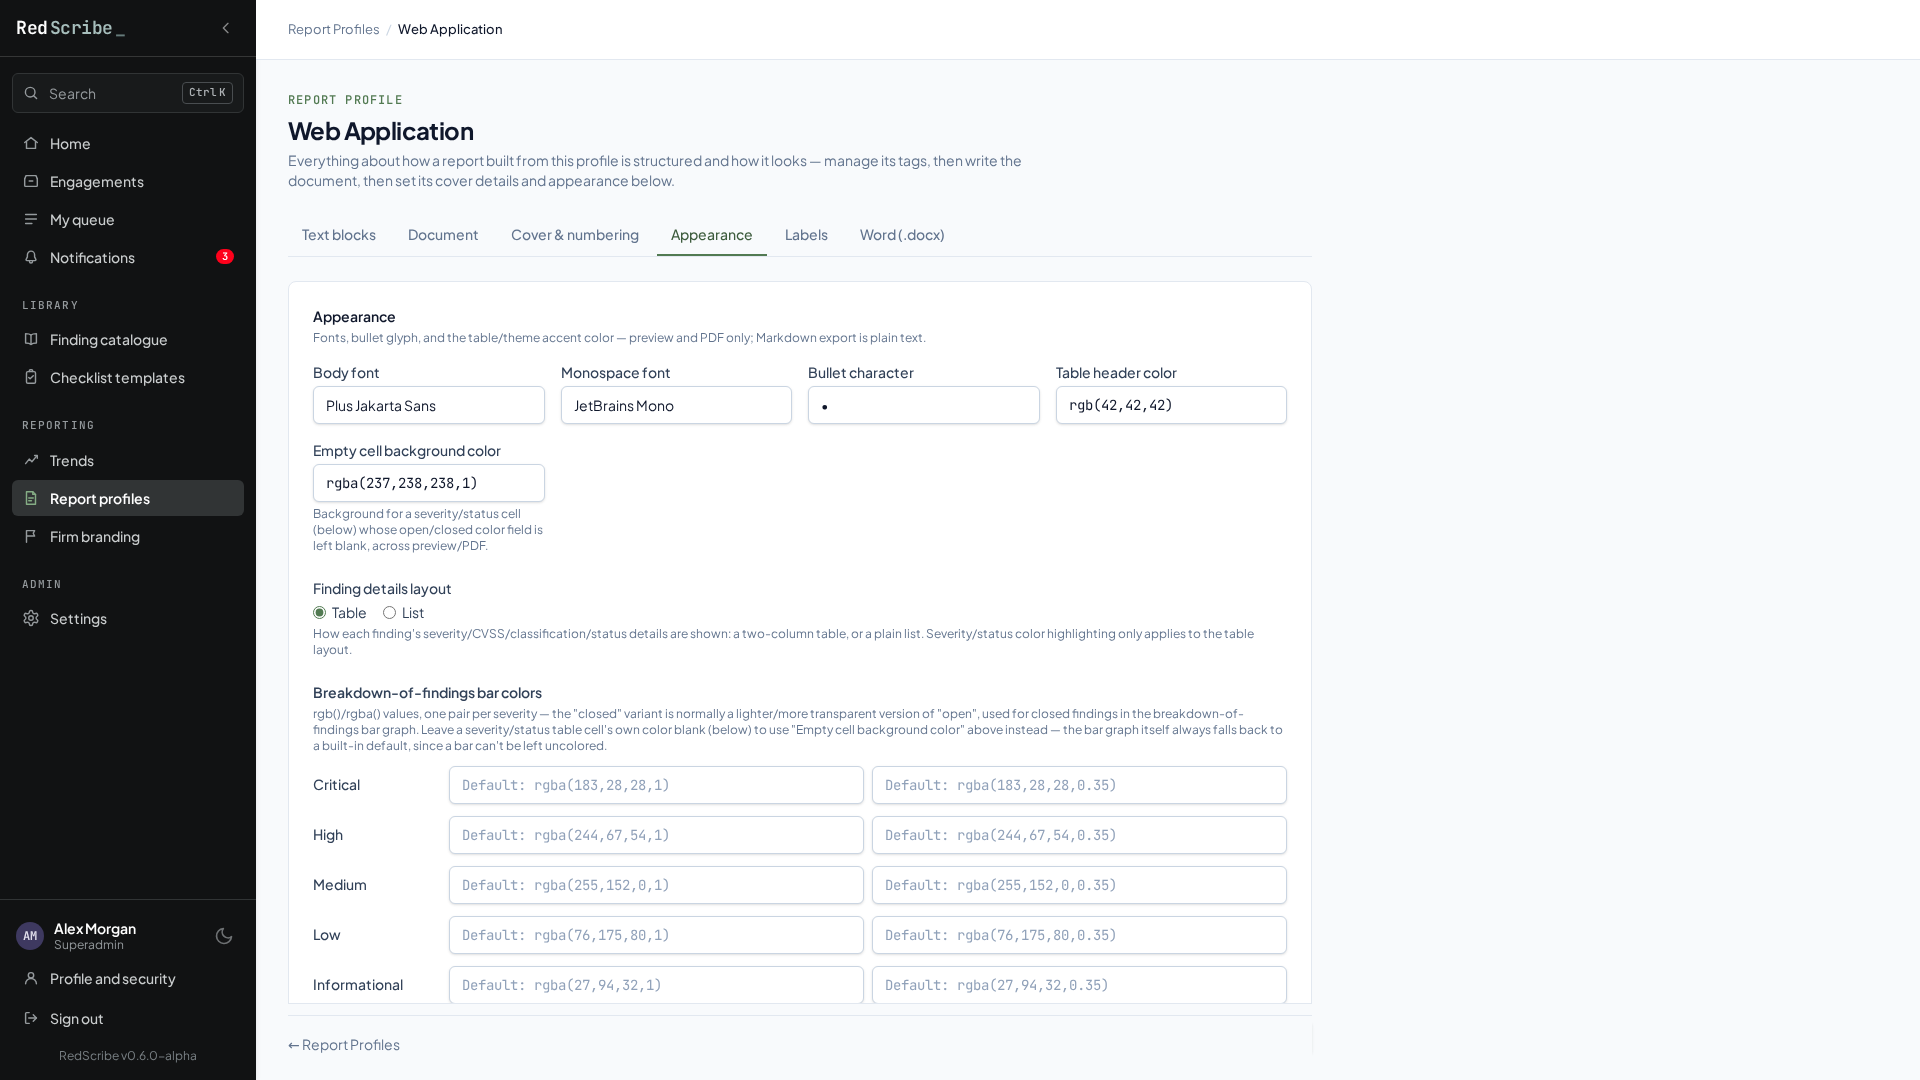
- Cover title, classification label (for example “Strictly
Confidential”), and finding ID prefix (for example the
FinF001). - Body font and monospace font, chosen from Google Fonts. The first time you pick one that isn’t already cached, RedScribe fetches it and stores its own copy, so later exports don’t depend on reaching Google Fonts again. If that fetch fails, you’ll get a warning and the report falls back to whatever font is installed wherever it’s viewed, rather than the export breaking.
- Severity colors, one open and one closed shade per severity level, used for per severity table theming across every export format.
- Table header color and empty cell background color.
- Finding table layout, whether findings render as a table or as stacked blocks.
- Bullet character, for bullet lists inside rich content.
Labels
Section titled “Labels”Every string a profile can rename instead of accepting the shipped English default, things like column headings (“CVSS score,” “Tested by,” “Linked findings”) and the severity and status words themselves. Leave a value blank and it falls back to the built in default, so a profile you’ve never touched here renders exactly as it always did. This is aimed at localization or house style rather than day to day use.
Text blocks
Section titled “Text blocks”Your own author defined prose sections, the way you add things like an executive summary, a disclaimer, or a methodology writeup without touching any code.
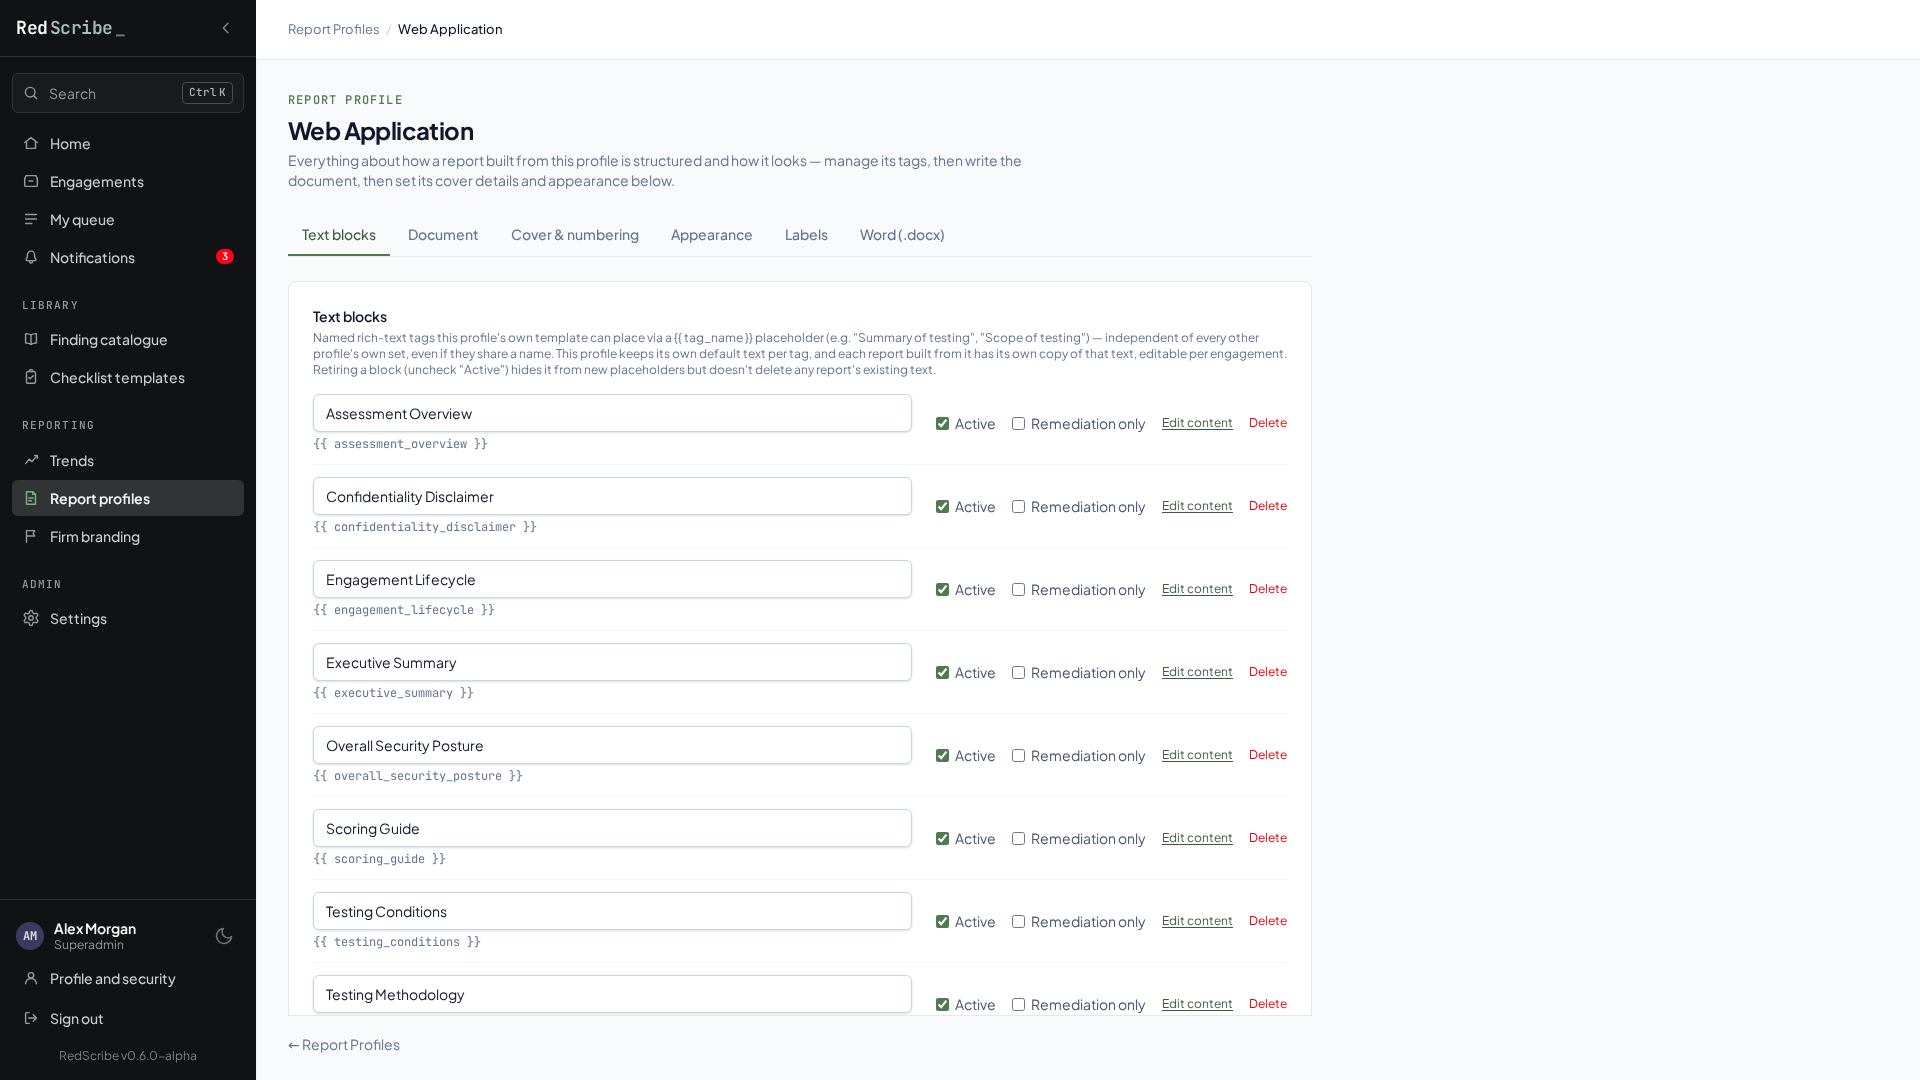
- Create a text block from the profile’s Text Blocks section, giving it a label. RedScribe generates an internal identifier from that label automatically.
- The block becomes available as a tag on this profile’s own template, the same way the built-in structural tags are (see Report template tags).
- Edit its default content from the block’s own edit page. This is what renders whenever a report doesn’t set a per report override.
- Delete a text block when you no longer need it. If its tag is still sitting in a template afterward, it’s simply skipped at render time rather than shown as a broken tag.
Word (.docx) template
Section titled “Word (.docx) template”An optional uploaded Word file that drives Word export instead of generating a document from scratch. A profile with nothing uploaded here simply has no Word export option; nothing else breaks.
- Upload a
.docxfile. RedScribe validates it immediately with a dry run render against dummy data, so a broken template is rejected on the spot, whether that’s a syntax problem in the template tags, a missing loop closer, or a file that isn’t really a.docx, rather than discovered later against a real engagement. - You’re taken straight to the style mapping screen. RedScribe reads every named style out of your uploaded document and lets you tell it which one is “the code block style,” “the image caption style,” and so on. The full walkthrough for each of those content roles lives in the DOCX template guide.
- Download the currently uploaded template at any time, or remove it to turn Word export back off for this profile. Removing it also clears the style mapping.
There’s also a download starter template link here: a working example with a finding loop and the tag patterns from the DOCX guide already in place, the fastest way to get something working instead of starting from a blank document.